Main Navigation Menu

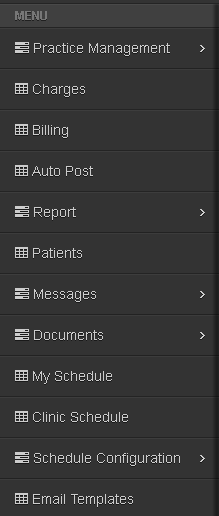
The Main Navigation Menu is available on screen when a patient is not selected. To access the main navigation menu click on ‘My Office’ or the Chart Talk Icon.

On desktop/laptop screens the Main Navigation Menu appears on the left hand side of the screen. In mobile browsers the Main Navigation Menu appears at the top of the Screen.

The Main Navigation Menu can be collapsed/expanded by toggling the green double arrow icon.

Main Navigation Menu

Medication Library

The medication library is a comprehensive list of all medication available to be selected for the individual patient medication list.

Chart Talk Medication Library
The Chart Talk Medication Library allows you to search, filter, and add medication and RxNorm codes
  1. Search Box- Type part or all of a medication name *NOTE – does not dynamically filter list
  2. Filter Button- Limits the list results to values containing text from the Search Box
  3. Add Medicine Button- If filter returns no results, this button will add the medication to the library and search for RxNorm values matching the medication name
  4. Recode Button –
    • When Medication is selected – Select a medication from the list by clicking on the row. Press recode while a medication is selected will search for a match in the NLM and return the RxNorm value.
    • When no medication is selected – Chart Talk will attempt to recode the entire medication library. *This can be data intensive and we advise you to only do this after business hours to keep other Chart Talk functionality responsive for all users.
  5. Medicine Name Column – Text value of medication
  6. RxNorm ID Column – coded value of medication
  7. List Navigation Controls – Page forward, backward, jump to page.

Clinic Reports

Clinic Reports can be enable or disabled for specific user roles.  Clinic reports serve functions that do not serve financial or quality reporting purposes.

Adding a report to favorites

To add a report to your favorites list, click the + on the selected report.
To remove a report from your favoties list, click the – on the selected report

Clinic Schedule

Chart Talk Chiropractic Clinic schedule for chiropractic practice management
Customize the Chart Talk clinic schedule to easily see information about your workday and your patients for chiropractic, massage, physical therapy, and other appointment types.

Provider Schedule: Time breakdown can be edited using CS Config

  1. Provider List can be modified to show more/less providers by clicking the ‘x’ for less and adding more by clicking in the blank area of the bar.
  2. Date navigation: Next/Previous day using the arrows, jump to ‘Today’, or use the Claendar date selection tool./li>
  3. Schedule View: Print and change view.
  4. Red line indicates current time
    1. Appointments

    2. Patient Name
    3. Appointment Status
    4. Alert Indicator
    5. Hover Message: hold cursor over appointment to see this message

Return to Previous View

Clinic schedule will launch with the last view/date during that log in session.

Email Templates

email-template
Your patient will receive an email asking them to Verify information to activate their participation in the Automatic Appointment Reminder/Email program.

  1. Email template selection
  2. Dynamic variable available – Select the value you would like to include in the body of your email
  3. Dynamic variable value – Paste this value into the body of the email. Will print out with patient values.
  4. Subject of email
  5. Body of email – Inclues dynamic variable values and mark up using the available tools.

Document List

document-list

When the document name is clicked, the document will open in Clinic Staff mode. The staff can assist the patient filling out the form and will remain logged into the EHR after the form is complete. To launch the document in a mode that is secure to hand a tablet to the patient, use the Kiosk Mode button (Circle K) in the right hand column.

    Filters

  1. Patient
  2. Document status
    1. To Do – Docuemnt has been assigned but not filled out and signed by the patient.
    2. In Progress – Patient has completed and signed the document. The document gas not been reviewed by the assigner or provider.
    3. Complete – Document has been signed by the assigner and patient.
  3. From date
  4. To date
  5. Clear filters
  6. Column Data

  7. Document Type
  8. Document status
  9. Patient Name
  10. Document assigned to patient date
  11. Launch document in Kiosk mode

Clearing Houses

Setting for Clearinghouses in Chart Talk

Group 1 – Alias and Envelope Settings

This information should not be changed from default. If you are creating a new clearing house, use the information from the above image if you are unsure what to enter.

Group 2 – FTP Folder Setup

You recive this information from your clearing house. If you are unsure, ask your clearinghouse for the names of the folders where they place the file types listed. Many times different filetypes are put in the same diectory.

Group 3 – Other settings

The settings are descriptive and describe the EDI loops and configuration they affect. If you are unsure, do not attempt to change settings without proper understanding of the purpose. Contact support at support[at]charttalk.cloud

Auto Post

How to: Use Autopost

Chart Talk Autopost 835 Claim Remittance
Post insurance checks recived electronically or use the check entry tool. Multiple patietn payments can be added from here without needing to navigate to every patient.

    Filters

  1. Claim ID
  2. Patient Name
  3. Check No
  4. Check Status
  5. Action Buttons

  6. Filter – Apply filters
  7. Reset – Clear filter list
  8. Check Input- Opens Check Input Tool
  9. Pt Pmts – Opens the patient payment tool. This allows you to enter a payment for the patient without needing to go to the patient page and upen manage payments.
  10. Submit – Processes any items marked Done.
  11. Column Data

  12. Claim ID
  13. Response Date Date 835 received
  14. Date of Service
  15. Patient Name
  16. Payer Name
  17. Is Processed
  18. Check No
  19. Action: Info – Display contents of the 835 electronic EOB
  20. Done – Done will make the item disappear from the default view of this screen.

Check Input Tool

Check Input Tab

Chart Talk Check Input Tool 2.0

Check/Charge Detail

    Filters

  1. Insurance selection drop down menu
  2. Check Number
  3. Total payment amount – This amount will be used as a final check when applying payments. If total does not reconcile with individual payments, the function cannot be completed
  4. Payment Type- Insurance Check, Direct Deposit, Insurance CC
  5. Date: Date on Check
  6. Data Input Fields

  7. Patient – Select patient name
  8. DOS – All charges not set to patient responsibility are available from oldest to newest
  9. Payment – Total payment for charge
  10. Adjustment – Adjustment for charge
  11. APT Balance- Amount of patient credit to apply to charge.
  12. Finished – Will assign the remainder of balance as patient responsibility
  13. Add – Adds record to box below
  14. Total- Total payment amount made to selected charge
  15. Balance due remaining on the selected charge
  16. Credit Bal- Any amount of credit the patient is carrying when patient account was loaded.
  17. Cloumn Details

  18. Patient Name
  19. DOS/Charge
  20. Payment amount
  21. Adjustment
  22. APT Credit
  23. Finished- ‘finished’ box checked will assign the remainder of balance as patient responsibility
  24. Delete charge – use this if you need to edit a line item and re-apply it
  25. Total Payment – Sum of all payments in the payment list
  26. Total Adjustment – Sum of all adjustments in the payment list
  27. Total Apply APT Amount – Sum of all patient credit payments applied in the patient list
  28. Save Progress- Save the details of the check to the ‘Saved Checks’ tab to be completed later.
  29. Apply Payments – Once the Total Payment(15) is equal to the check amount (3) payments will be applied to all accounts when clicking this button.

Saved Checks Tab

Check Input Tool
Check Input Tool – Saved Checks Tab
    Filters

  1. Check No – Filter list by check number
  2. Payer – Filter list by Payer
  3. Check Staus – By default, filter is set to Not Applied
  4. Buttons

  5. Filter – Apply filter value to list
  6. Reset – Clear filter values
  7. Columns – Values from saved check data

  8. Check Date
  9. Check No.
  10. Amount
  11. Payment Type
  12. Total Patients
  13. Applied
  14. Pencil – Loads check details to Check Input tab to continue editing