Memos

Definitions:

Context -These are the areas that you want to be notified with this memo. You can select just on or multiple contexts for a specific memo. If you want to add a context after you have created a memo, you need to create a new memo record.

Content – This is your memos message, tailored to the contexts where the message is pertinent.

Acknowledge – Acknowledging the memo will stop the message from being displayed in all of the contexts.

Delete – Removes the memo, never to be seen or heard from again.
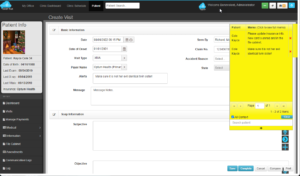
Chart Talk Memo Dock
The Chart Talk Memo Dock is on the right side of your screen.

Memo Mangement Screen

The memo management screen list each combination of memo content and context seperately. In the memo dock these messages will be grouped together and will all be acknowledged at the same time.

Creating a Memo

Contexts

    1. Clinic Schedule

– Visual indicator that memo exisits on appointment block. When scheduling an appointment for a patient, Memo dock will display memo content.

    1. Route Slip

– All active memos will be listed on patient route slip below header information.

    1. Auto Post Screen

– When posting payments for a patient, Memo dock will display memo content.

    1. Check Input Tool

– When entering payments for a patient, Memo dock will display memo content.

    1. SOAP

– – When launching or viewing the SOAP screen for a patient, Memo dock will display memo content.

    1. Billing Screen

– When entering payments for a patient, Memo dock will display memo content.

    1. Patient Payment Screen

– Visual indicator that memo is active for this context on appointment block. When scheduling an appointment for a patient, Memo dock will display memo content.

    1. Clinic Dashboard

– Visual indicator that memo exisits on appointment row.

Content

Up to 2000 Characters in length. If the memo content needs to exceed 2000 characters, consider using File Cabinet and templates for the message and memo as a reminder.

LINKS:

How to enable Memos
How to use Memos

Payer Information (Patient)

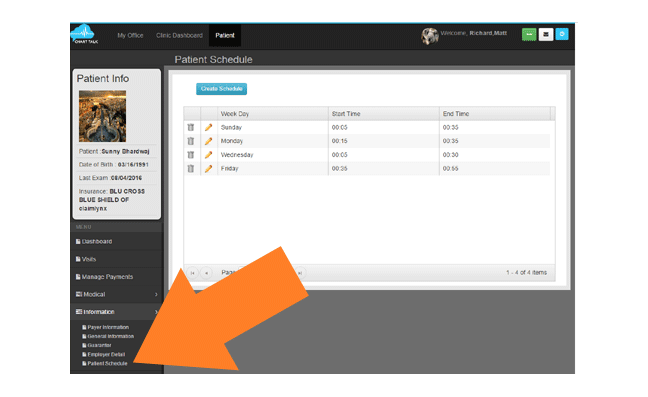
Navigate to Patient

Information

Payer Information


  1. Chose Insured or Non Insured
  2. Payer Name
  3. Pick applicable preference
  4. Click box to make active
  5. Click Add

  6. Member( clinic Reference)
  7. Insurance ID (REQUIRED FIELD)
  8. Type (Clinic Reference)
  9. Group Number
  10. Co-Pay($) (will populate an alert with ($) amount when checking in from clinic Dashboard)
  11. Co-Insurance(%)
  12. Relation (depending on who is selected information is pulled from General Information)
  13. Fields 12 – 21 only active in Relation is not SELF
  14. First Name (depending on who is selected information is pulled from General Information)
  15. Middle Name (depending on who is selected information is pulled from General Information)
  16. Last Name (depending on who is selected information is pulled from General Information)
  17.  DOB (depending on who is selected information is pulled from General Information)
  18.  Sex (depending on who is selected information is pulled from General Information)
  19. Street Address (depending on who is selected information is pulled from General Information)
  20.  City (depending on who is selected information is pulled from General Information)
  21.  State (depending on who is selected information is pulled from General Information)
  22.  Zip (depending on who is selected information is pulled from General Information)
  23. Phone (depending on who is selected information is pulled from General Information)
  24. NPI Number( not used. Treating provider NPI pulls from user set up)

Authoriztions

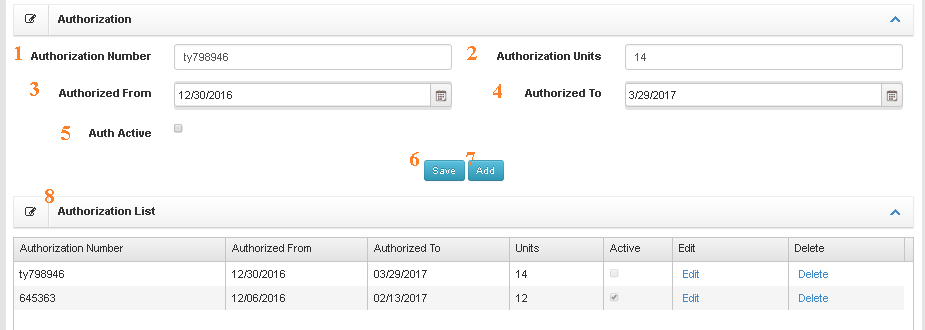
Insurance Authorizations

  1. Authorization Number – Reference number
  2. Authorization Units – Allowed visits
  3. Authorized from – Beginning date
  4. Authorized to – End date
  5. Auth Active – Only one authorization range can be active at a time
  6. Save
  7. Add – Clears fields to enter a new authorization if in edit mode.
  8. Authorization List – History of insurance authorizations for patient.
  9. Send Auth. in Edi- Will include Authorization number in Electronic Claim (only send if insurance requires, over rides other references)

Referring Provider (Patient Menu)

  1. Select Provider – List is populated by master referring provider table
  2. Assign provider – Adds selected provider to list and brings up detail entry tool.
  3. Add referring provider – Add a referring provider to the master referring provider table from this screen
  4. Main – Only one entry can be main. When marked main the referring provider inforamtion will be included in box 17 of the CMS 1500
  5. Referring Provider
  6. Qualifier – Included in box 17 of CMS 1500
  7. Referral Date
  8. Referring Reason
  9. Edit Record
  10. Delete Record

General Information (Patient)

  1. Basic Information
    1. Patient Number
    2. First Name
    3. Middle Name
    4. Last Name
    5. Gender
    6. User Name – Generate Password
    7. Email – When Blue ‘Verify Email’ button is present, email has not been verified by the patient.
    8. Date of Birth
  2. Contact Information
    1. Address
    2. City
    3. State
    4. Zip
    5. Home Phone
    6. Emergency Contact Name
    7. Cell Phone
    8. Emergency Phone
    9. Contact Preference By – email needs to be selected to enable appointment reminders
  3. Additional Information
    1. Preferred Language
    2. Race
    3. Notes – This field refelects values in messages field on Visits screen
    4. Ethnicity
    5. Inactive
    6. Do not include in statement batch

Guarantor

Patient_Gurantorinformation

Add Guarantor Form

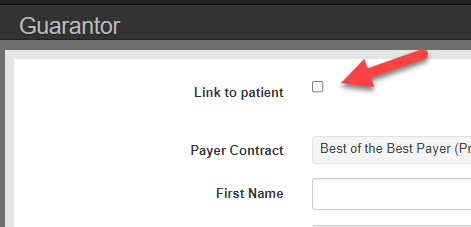
BEST PRACTICE:

Click ‘Link to Patient’ box and choose patient.
Best Practice link patient guarantor to another patient account

Otherwise …

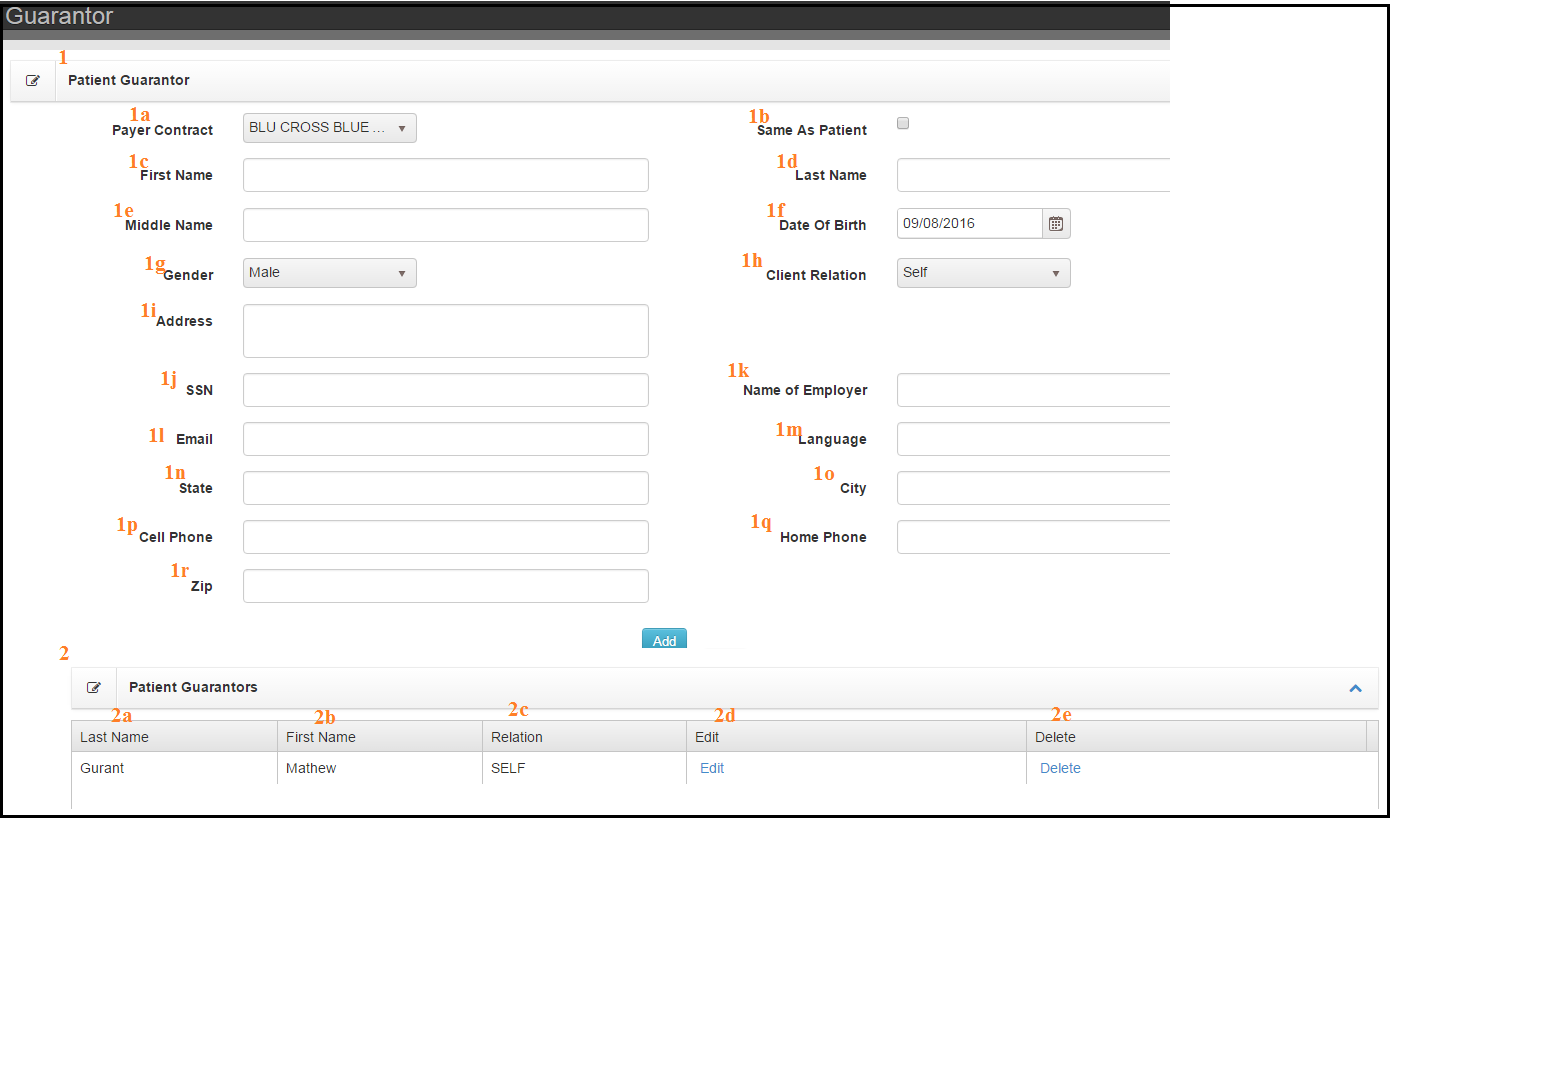
  1. Patient Guarantor
    1. Payer Contract – Select primary payer
    2. Same as patient – Tic box to save time completing form
    3. First Name
    4. Last Name
    5. Middle Name
    6. Date of Birth
    7. Gender
    8. Client Relation
    9. Address
    10. SSN
    11. Name of Employer
    12. Email
    13. Language
    14. State
    15. City
    16. Cell Phone
    17. Home Phone
    18. Zip

Add Button commits form.

Column Data

  1. Patient Guarantors
    1. Last Name
    2. First Name
    3. Relation
    4. Edit
    5. Delete

All Guarantors will show up as options to recieve payments.

NOTE: Any new patient created will automatically have guarantor added as self.