Amendments

An amendment is an official request made by the patient or patient representative. An amendment can be accepted or denied. If an amenedment is accepted it is the responsibility of the provider to update the patient record accordingly.

amendment

    Filter Values

  1. Subject
  2. Source
  3. Action Buttons

  4. Filter – Apply filters
  5. Reset – Clear filters
  6. Column Data

  7. Subject
  8. Status
  9. Source
  10. Date
  11. Time

Representative

A patient representative is a parent, guardian, caretaker or other responsible party for the patient. A patient representative can log into the patient portal to see information for the patient they care for. The patient representative can also recieve appintment reminders from Chart Talk bookings for a patient.

To enable the messagesing feATURE:

  1. Search for and open the patient record
  2. Expand Information and select Patient Representative
  3. Click Create or Edit an existing record.
  4. Tic the box for recieve reminders

*Only one representive can be selected to recieve reminders

A patient can allow other parties to access their chart as a Patient Representative

*Note – The patient needs to access the patient portal in order to give a Patient Representative access.

Creating a patient representative gives an interested party access to the same information and engagement functionality as your patients.

Setting Up a Patient Representative

It is the patient that allows access to their representative. From the Patient Dashboard select Patient Representative from the Navigation Menu

The patient can use the Create button to set up one or many representatives.

How To: Login Patient Portal as Representative

Clinic Reports

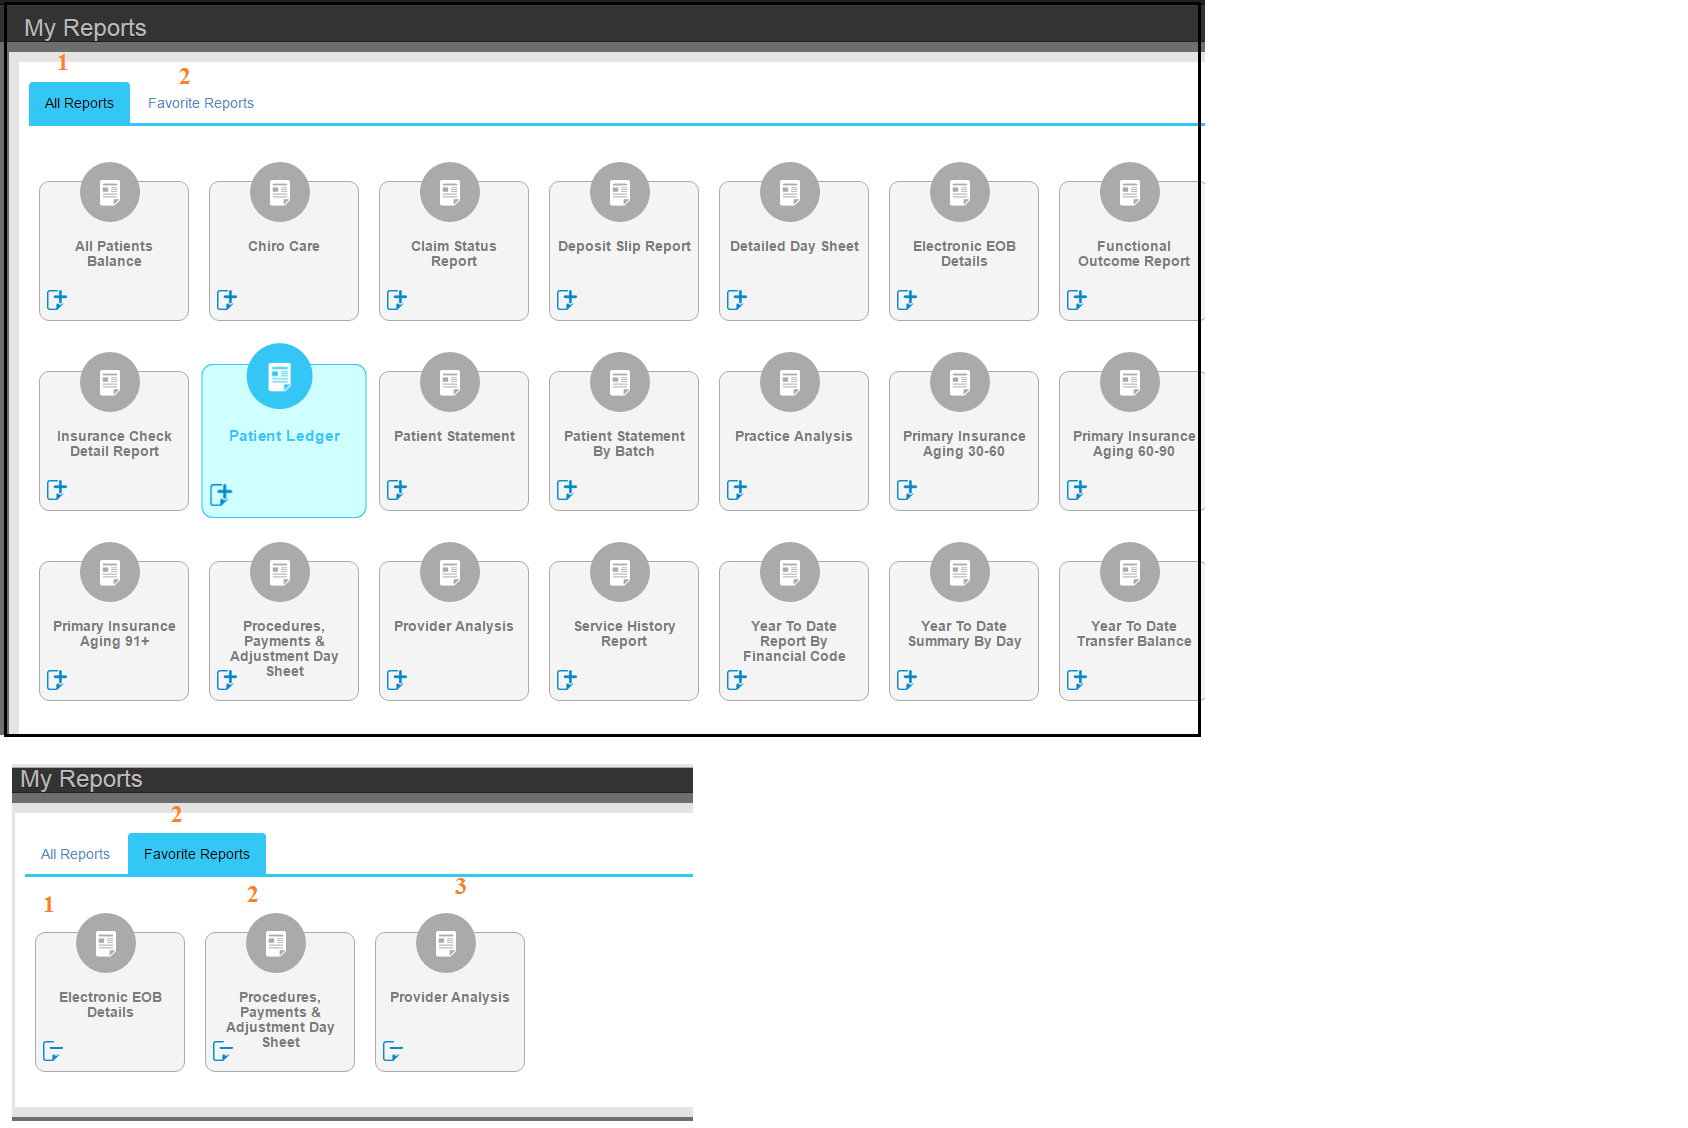
Clinic Reports can be enable or disabled for specific user roles.  Clinic reports serve functions that do not serve financial or quality reporting purposes.

Adding a report to favorites

To add a report to your favorites list, click the + on the selected report.
To remove a report from your favoties list, click the – on the selected report

Email Templates

email-template
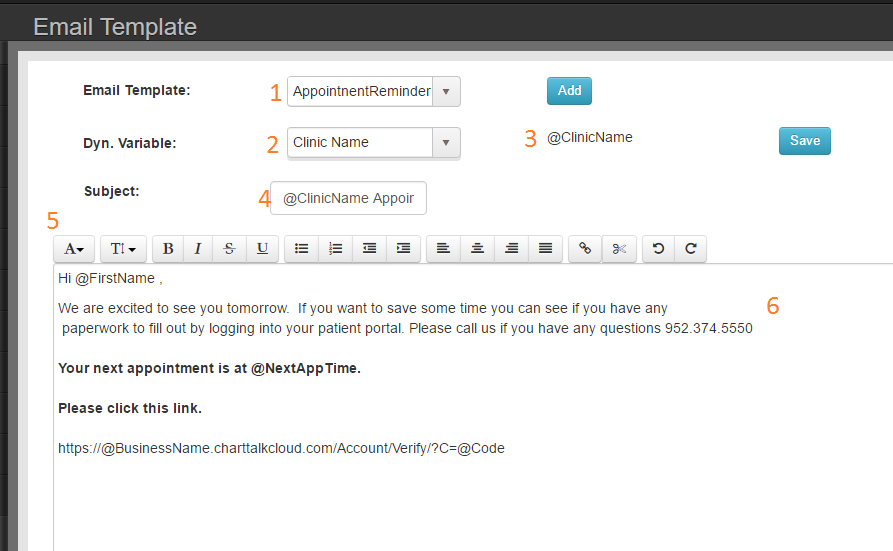
Your patient will receive an email asking them to Verify information to activate their participation in the Automatic Appointment Reminder/Email program.

  1. Email template selection
  2. Dynamic variable available – Select the value you would like to include in the body of your email
  3. Dynamic variable value – Paste this value into the body of the email. Will print out with patient values.
  4. Subject of email
  5. Body of email – Inclues dynamic variable values and mark up using the available tools.

Patient Portal

The Patient Portal is a secure way for your patients to access information which has been assigned to them for completion by the clinic. They will also be able to communicate back to the clinic and review specific information available in their individual Portal.

For a New Patient: Patient will automatically receive an email asking them to verify their valid email address and instructions to set up their secure Login and Password. Patient must have contact preference Email selected.

For an existing Patient, Once you enter their email or update their email address on their General Information screen, press the Verify button to the right and the instructional email will send to the patient. Patient must have contact preference Email selected.

**NOTE: Check the box for email as the patient’s contact preference on the General Information screen.

When the patient accesses their Patient Portal this screen will open and let them know
If and how many documents are pending completion by them.

By clicking OK the screen will enable and allow them to choose the outstanding documents (s)
and complete. Once completed the documents will automatically store in the correct screens
within Chart Talk. ie: Chief Complaint form will appear in the Subjective portion of their upcoming
visit SOAP.

To complete, click on the document hi-lited in Blue and the document will open for completion.

The Portal Tabs:

The General Information Tab: Allows the patient to view their demographic information but does not allow for any changes or additions.

Synopsis Tab: Gives an overview of the Patient Dashboard but does not allow for any changes or additions.

Download Summary Tab: Gives an overview of the patient care and can be printed by the patient.

Amendments: The patient can create an amendment that they feel the provider should be aware of and could be added to their health information on file. When this is completed, the Amendment will show on the My Office Overview, under Pending Amendments. The provider will access it and approve it and save to the patient record or discuss it and deny it from entering into the patient record.

What the Patient creates in their Amendments Tab in their portal:

What the Clinic sees on the My Office Dashboard:

What the Provider will review once he/she clicks on the patient name in Blue, and can then
Choose to Approve and Save it into the patient record or Deny and discard.

The Patient Representative Tab: Allows the Representative to access the information on
Behalf of the Patient securely.

Message: Allows for communication with your patient in a secure environment

Log: Is the Audit Log of who, what, and when information was accessed within the patient portal for this specific patient.
Clearing Houses

pm_clearinghouse

    Connection Details

  1. Clearing House Name
  2. Sender Id- Clearinghouse specific
  3. Receiver Id- Clearinghouse specific
  4. Interchange qualifier- Clearinghouse specific
  5. FTP URL- Set up by clearinghouse
  6. FTP Port- Set up by clearinghouse
  7. FTP UserName- Set up by clearinghouse
  8. FTP Password- Set up by clearinghouse
  9. FTP Folder Setup

  10. Submit Claim To- Folder for 837
  11. Read Ack From- Folder for 999
  12. Read Resp. From- Folder for 835
  13. Other

  14. Default for Batch Submit-
  15. Set Test Account- Works for Office Ally to test claims

Guarantor

Patient_Gurantorinformation

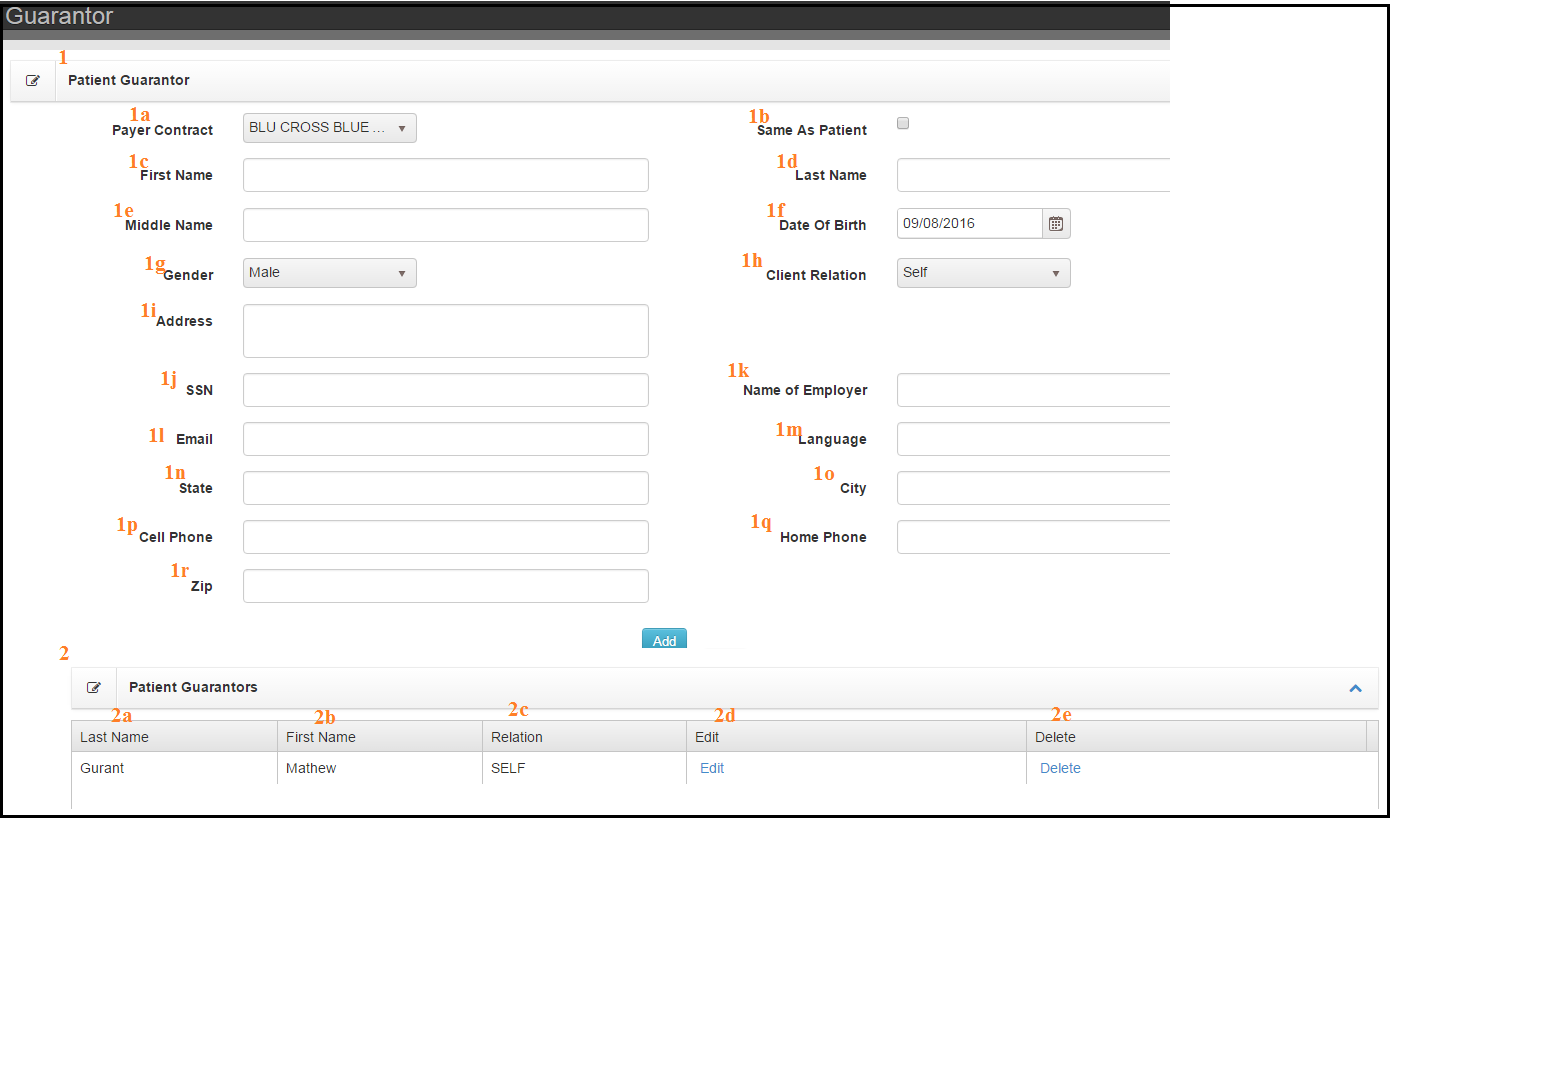
Add Guarantor Form

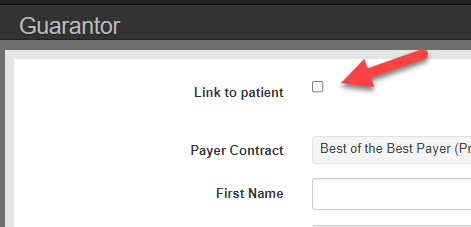
BEST PRACTICE:

Click ‘Link to Patient’ box and choose patient.
Best Practice link patient guarantor to another patient account

Otherwise …

  1. Patient Guarantor
    1. Payer Contract – Select primary payer
    2. Same as patient – Tic box to save time completing form
    3. First Name
    4. Last Name
    5. Middle Name
    6. Date of Birth
    7. Gender
    8. Client Relation
    9. Address
    10. SSN
    11. Name of Employer
    12. Email
    13. Language
    14. State
    15. City
    16. Cell Phone
    17. Home Phone
    18. Zip

Add Button commits form.

Column Data

  1. Patient Guarantors
    1. Last Name
    2. First Name
    3. Relation
    4. Edit
    5. Delete

All Guarantors will show up as options to recieve payments.

NOTE: Any new patient created will automatically have guarantor added as self.