Memos

Definitions:

Context -These are the areas that you want to be notified with this memo. You can select just on or multiple contexts for a specific memo. If you want to add a context after you have created a memo, you need to create a new memo record.

Content – This is your memos message, tailored to the contexts where the message is pertinent.

Acknowledge – Acknowledging the memo will stop the message from being displayed in all of the contexts.

Delete – Removes the memo, never to be seen or heard from again.
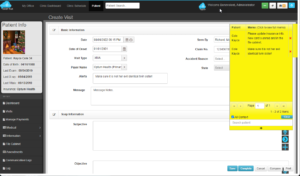
Chart Talk Memo Dock
The Chart Talk Memo Dock is on the right side of your screen.

Memo Mangement Screen

The memo management screen list each combination of memo content and context seperately. In the memo dock these messages will be grouped together and will all be acknowledged at the same time.

Creating a Memo

Contexts

    1. Clinic Schedule

– Visual indicator that memo exisits on appointment block. When scheduling an appointment for a patient, Memo dock will display memo content.

    1. Route Slip

– All active memos will be listed on patient route slip below header information.

    1. Auto Post Screen

– When posting payments for a patient, Memo dock will display memo content.

    1. Check Input Tool

– When entering payments for a patient, Memo dock will display memo content.

    1. SOAP

– – When launching or viewing the SOAP screen for a patient, Memo dock will display memo content.

    1. Billing Screen

– When entering payments for a patient, Memo dock will display memo content.

    1. Patient Payment Screen

– Visual indicator that memo is active for this context on appointment block. When scheduling an appointment for a patient, Memo dock will display memo content.

    1. Clinic Dashboard

– Visual indicator that memo exisits on appointment row.

Content

Up to 2000 Characters in length. If the memo content needs to exceed 2000 characters, consider using File Cabinet and templates for the message and memo as a reminder.

LINKS:

How to enable Memos
How to use Memos

Service Type

Service Type
Online Service Types are mapped to Chart Talk Appointment Types.
  1. Service – This is the displayed name the patient will select from your online portal. Multiple service types can be mapped to the same appointment type in Chart Talk.
  2. Appointment Type – The appointment type is listed in Chart Talk and is created under Schedule Configuration > Appointment Types
  3. Is New Patient – If you expect this appointment type to selected by patients not in your Chart Talk database, the online appointment tool will ask for additional patient information.
  4. Status – detemines if the service type is active.
  5. Create – Launch the New Service Type Tool.
  6. Edit – Edit the properties of a specific service type.


Online Provider Availability

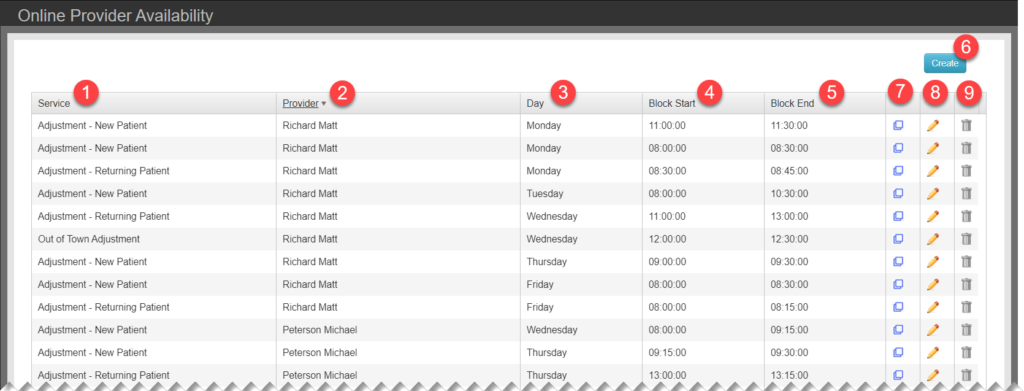
For Every Open Availability Block in the Online Appointment Request Page, there needs to be one row in the online availability table.

Online Appointment Request
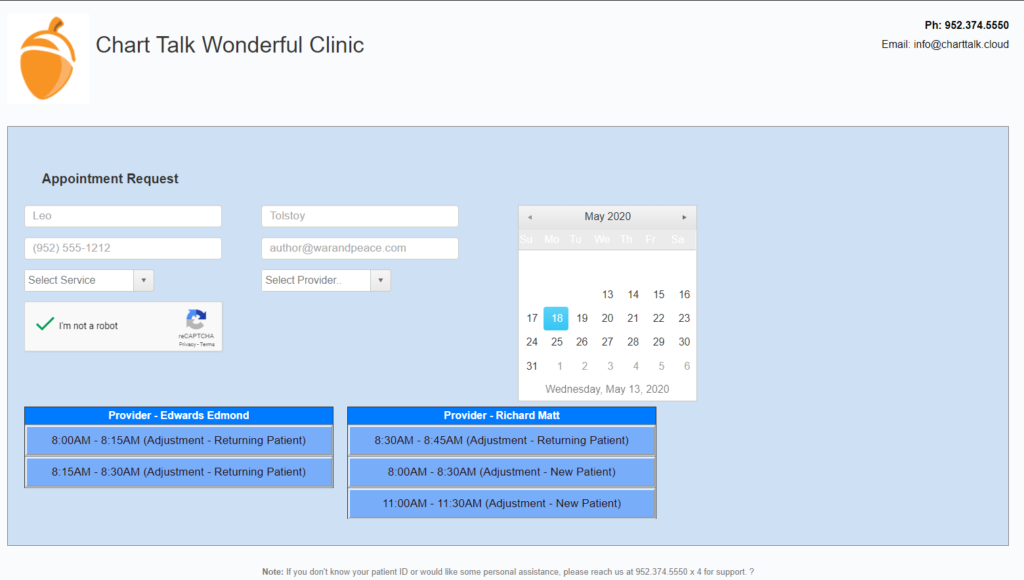
This is what the online appointment request page looks like. Without any values in the provider or service type filter, the page displays all appointements available on the selected day.


Onlione prover list availability
Online Provider Availability List –
  1. Service
  2. Provider
  3. Day
  4. Block Start
  5. Block End – Descrepency between this value and the duration of the associated appointment type will default to the appointment type duration on the displayed schedule.
  6. Launch the Availability Tool
  7. Copy – Opens the Availability tool with the rows values (except Provider name) already completed.
  8. Edit – Change values of the existing row
  9. Delete – Delete the existing row

Booking Settings

About: Chart Talk Bookings is a service that allows clinics to include their own branding for integrated on-line booking, on-line payment portal*, and appointment reminders. This booking seetings page allows your clinic to configure the clinic branded page.


Pictured above is the preview of an example clinic template

  1. Area 1 Color: The color of the outer border of the page.
  2. Area 2 Color: The color of the the inner page content.
    1. Font Size in Area 2
    2. Font Color in Area 2
    3. Return Landing Page : When patient completes functions, their browesr will be returned to your web site.
  3. Clinic name presented as H1 header tag in patient portal
  4. Clinic phone number
  5. Clinic contact email address
  6. Clinic logo: for best results use .PNG filetype approx. 250 x 250 px @ 75 dpi. Logo atomatically links to Return Landing Page.
  7. Footer Message: Appears on the footer of all generated pages for clinic.

Appointment Type

Appointment types control scheduling functions on Clinic Schedule and My Schedule

  1. Type Name – Name of appointment type
  2. Color (background color)
  3. Patient Name Font Color
  4. Appointment Status Font Color
  5. Duration
  6. Soap Type – Choose yes if SOAP documentation should be generated for this appointment type

To edit an Appointment Type (Do not delete an appointment type that is in use):

  1. Expand the Schedule Menu and Select Appintment Types
  2. Click the Pencil Icon next to the appointment type you want to edit
  3. Click the Drop Down Icon for the color selection, use the color wheel to select your color and click Apply
  4. Click Save