Sometimes a patient updates you with their correct insurance information after they have begun traement and you need to resubmit their claims. To do this you need to rest the claims from the Reset claims screen, then update the payer and submit the claims from the Billings Screen.
Step 1. Reset the claims
When you reset a claim you are saying “Forget I sent this, let’s start over fresh.” Resetting a claim is a simple process. DO NOT Reset claims if your claim needs to reference the previous claim (Please see Create a Corrected Claim).

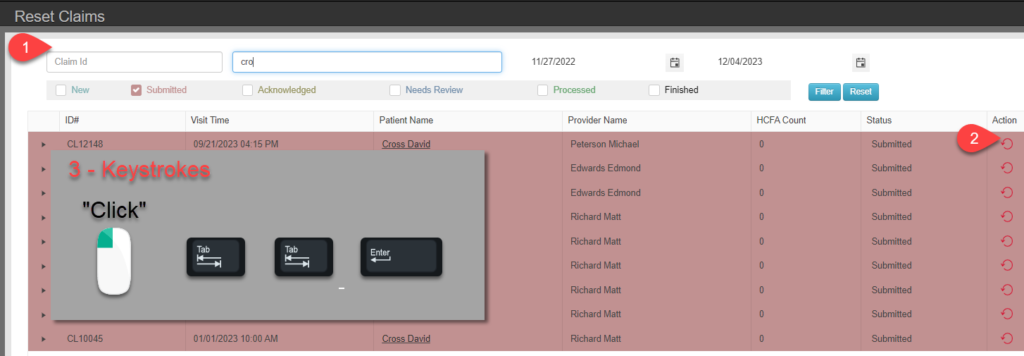
- On the reset claim screen, modify the filter values (Patient name and dates of service) to display the series of dates of service that you want to reset.
- Position your cursor over the first record and the Reset Claim icon
- Click , Press Tab, Press Tab, Press Enter
- This will reset the claim, acknowledge that you are aware that this action is what you are trying to perform and that you understand the consquences, and position the cursor over the next record to reseet.
- Repeat Step 3 until you are finished
Step 2. Update the Payer for the Claims

- All the reset claims will be on the Billing screen listed as new.
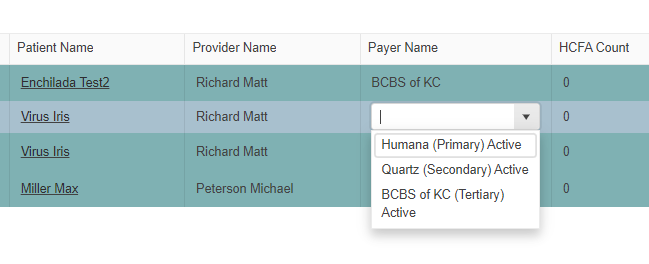
- In the column listing the Payer the claims are going to, click the payer name and select the correct payer from the drop down menu.
- Repeat until all claims are updated.
- Select all claims and click ‘Submit Electronically’