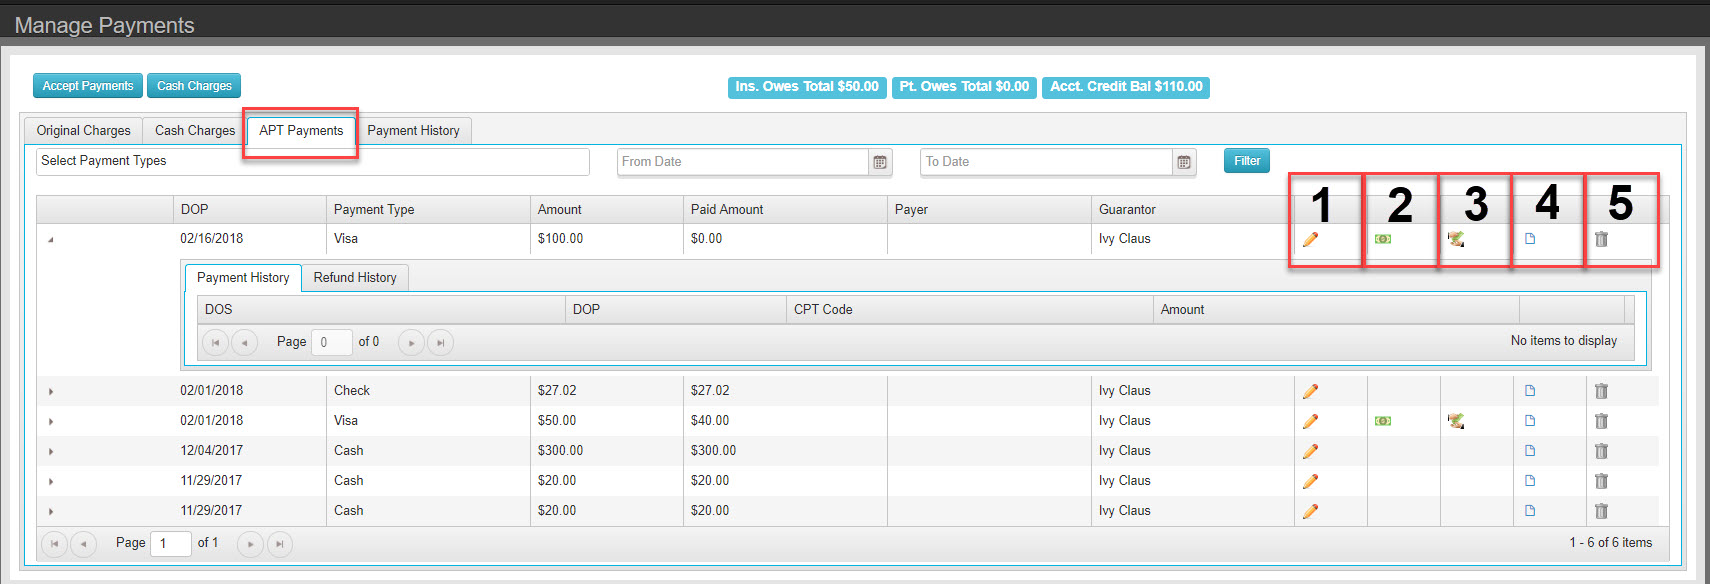
1. Edit
![]()
This action will allow the user to edit an existing payment. When clicking on the pencil Icon an Update payment box will pop-up.
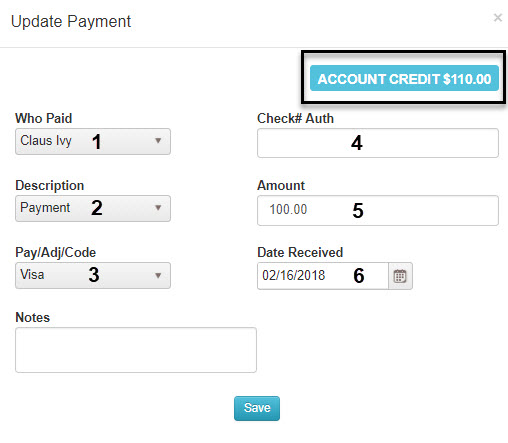
- Who paid
- Description
- Pay/Adjust/Code
- Check# Auth
- Amount
- Date Received
Any of these values can be changed and updated as needed.
Make Sure to click “Save” to save any changes or updates to the payment.
2.Apply Payment
![]()
This action will allow the user to apply this individual payment to any charges that have an outstanding balance. User can apply to charges marked as patient responsibility and charges pending insurance payment.
Note: This icon only appears when there is funds left to apply.
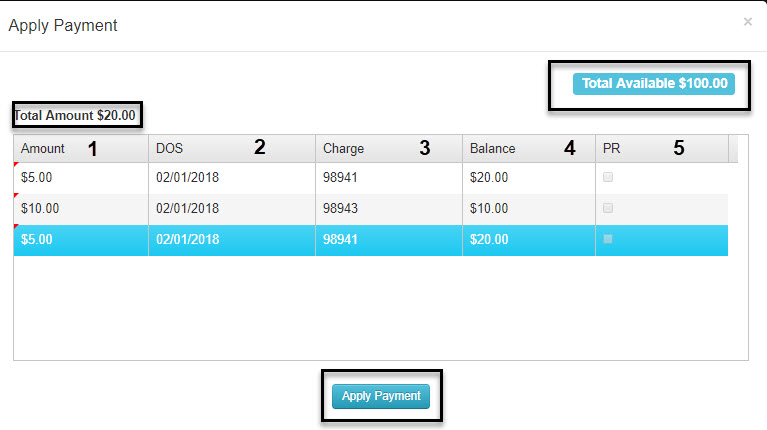
- Amount- Manually key in the value you want to apply to a charge
- DOS- Dates of service appear oldest to newest charges
- Charge- CPT code/Service changed on a Visit
- Balance- Balance remaining on CPT Code/Service
- PR(patient responsibility)- will show marked as true if this CPT code/service is marked as PR
3. Add Refund
![]()
This action will allow the user to apply a refund on credit balance from a payment.
Note: This icon only appears when there are funds left to refund.
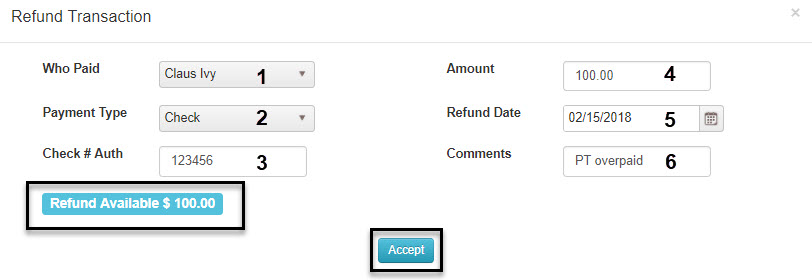
- Who Paid- Who are you issues the refund to? Should be the same person who made the payment, in most cases the guarantor.
- Payment Type- How are you issuing the refund?
- Check # or Auth- List or enter if you have any referencing number you wish to record
- Amount- Amount of the refund. The lower left shows how much you have available to refund. You can only refund up to that amount.
- Refund date- List the date you want to show you refunded this payment
- Comment- any comment you want to record for future reference
**Notice the Amount and Paid Amount now show the refunded amount and how much of it is applied. The Edited amount is now bold to give a visual indicator there is a refund to an original amount. Click the “Refund History” Tab and details will show what the original amount was and what was refunded.

4. Payment Receipt
![]()
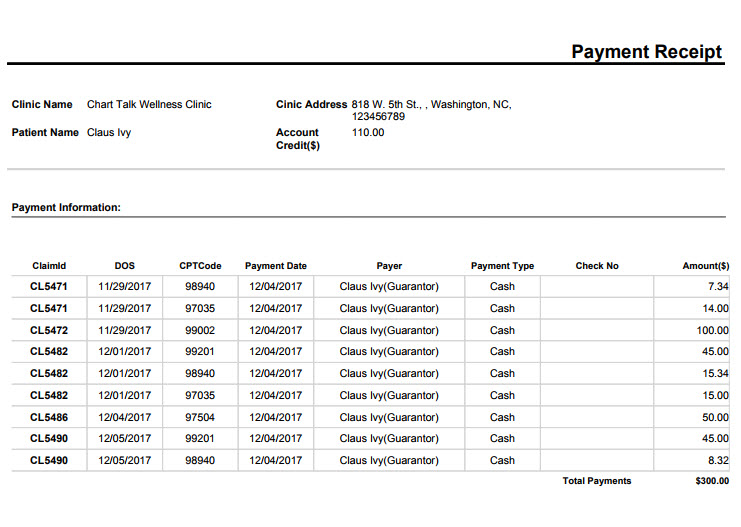
This action will allow the user to print a payment receipt for an individual payment. If the payment is applied to charges it will show what it is applied to.
5. Delete
![]()
This action will allow the user to delete CPT codes/Services off of a payment or delete the entire payment entry.
Note: You can not delete a payment entry until you have deleted everything the payment is applied to.
